

Basic Fixes
- Use another VPN server: Most VPN apps have hundreds of servers. If a specific server experiences an outage, move to another server and try your luck in Google Chrome.
- Update VPN app: vpn apps is release frequently release update to add new feature and fix bug . You is update should update the VPN app and try again .
- Clear Chrome cache: Google Chrome collect cache in the background ; some websites is try may try to load content from such save file . try clear the cache and try again . To learn more , read what happen when you clear browse datum in Chrome .
- Update Google Chrome: Outdated Google Chrome can sometimes conflict with VPN software. To get things working smoothly again, update Chrome to the latest version.
Fix 1: Disable Chrome Extensions
One of the installed extensions may interfere with the VPN on Chrome. To fix this, disable or delete irrelevant extensions from Chrome.
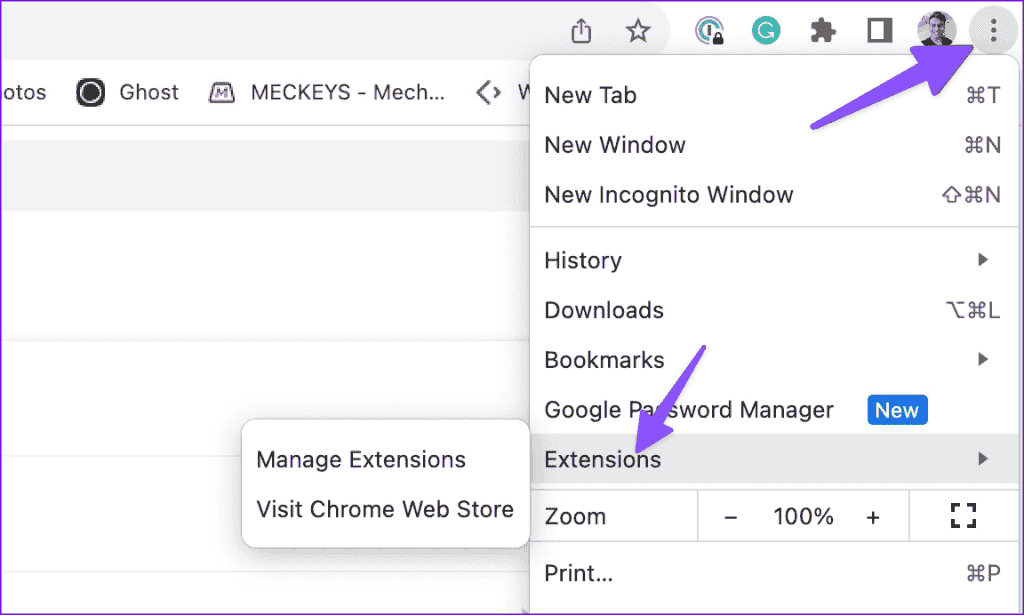
step 1: Launch Chrome and click the three-dot menu.
step 2 : SelectExtensions and open manage extension.
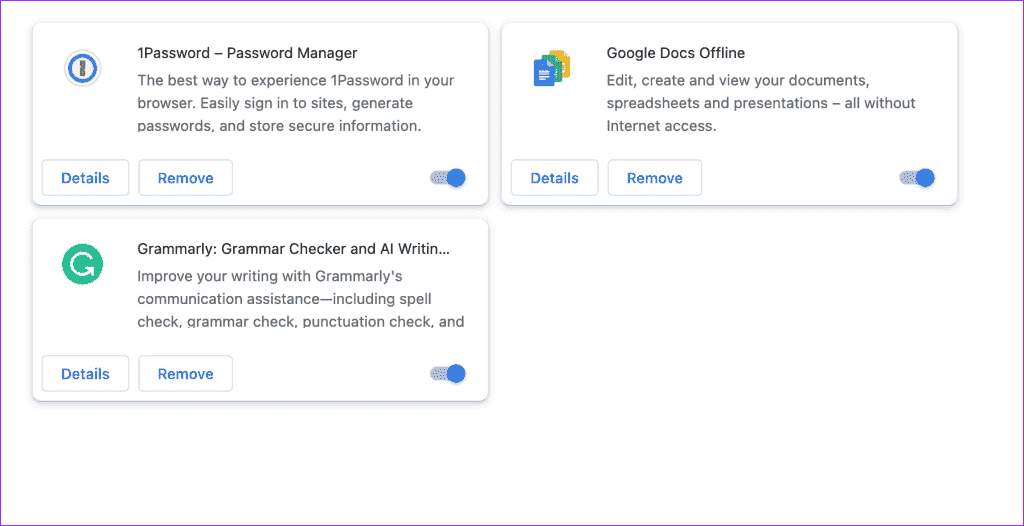
Step 3: Disable or delete extensions from the following menu.
Also read: How to set a custom search engine as default in Chrome
Fix 2: Disable QUIC in Chrome
QUIC (Quick UDP Internet Connections) is a relatively new protocol that might not be fully compatible with all VPNs. Disabling it can help you fix the issue.
step 1: open chrome and typechrome://flags in the address bar.
This will open the Chrome flags page, which contains experimental features.
step 2: In the search bar , typeQUIC.
Step 3: Click on the drop-down menu for Experimental QUIC protocol and select Disabled.
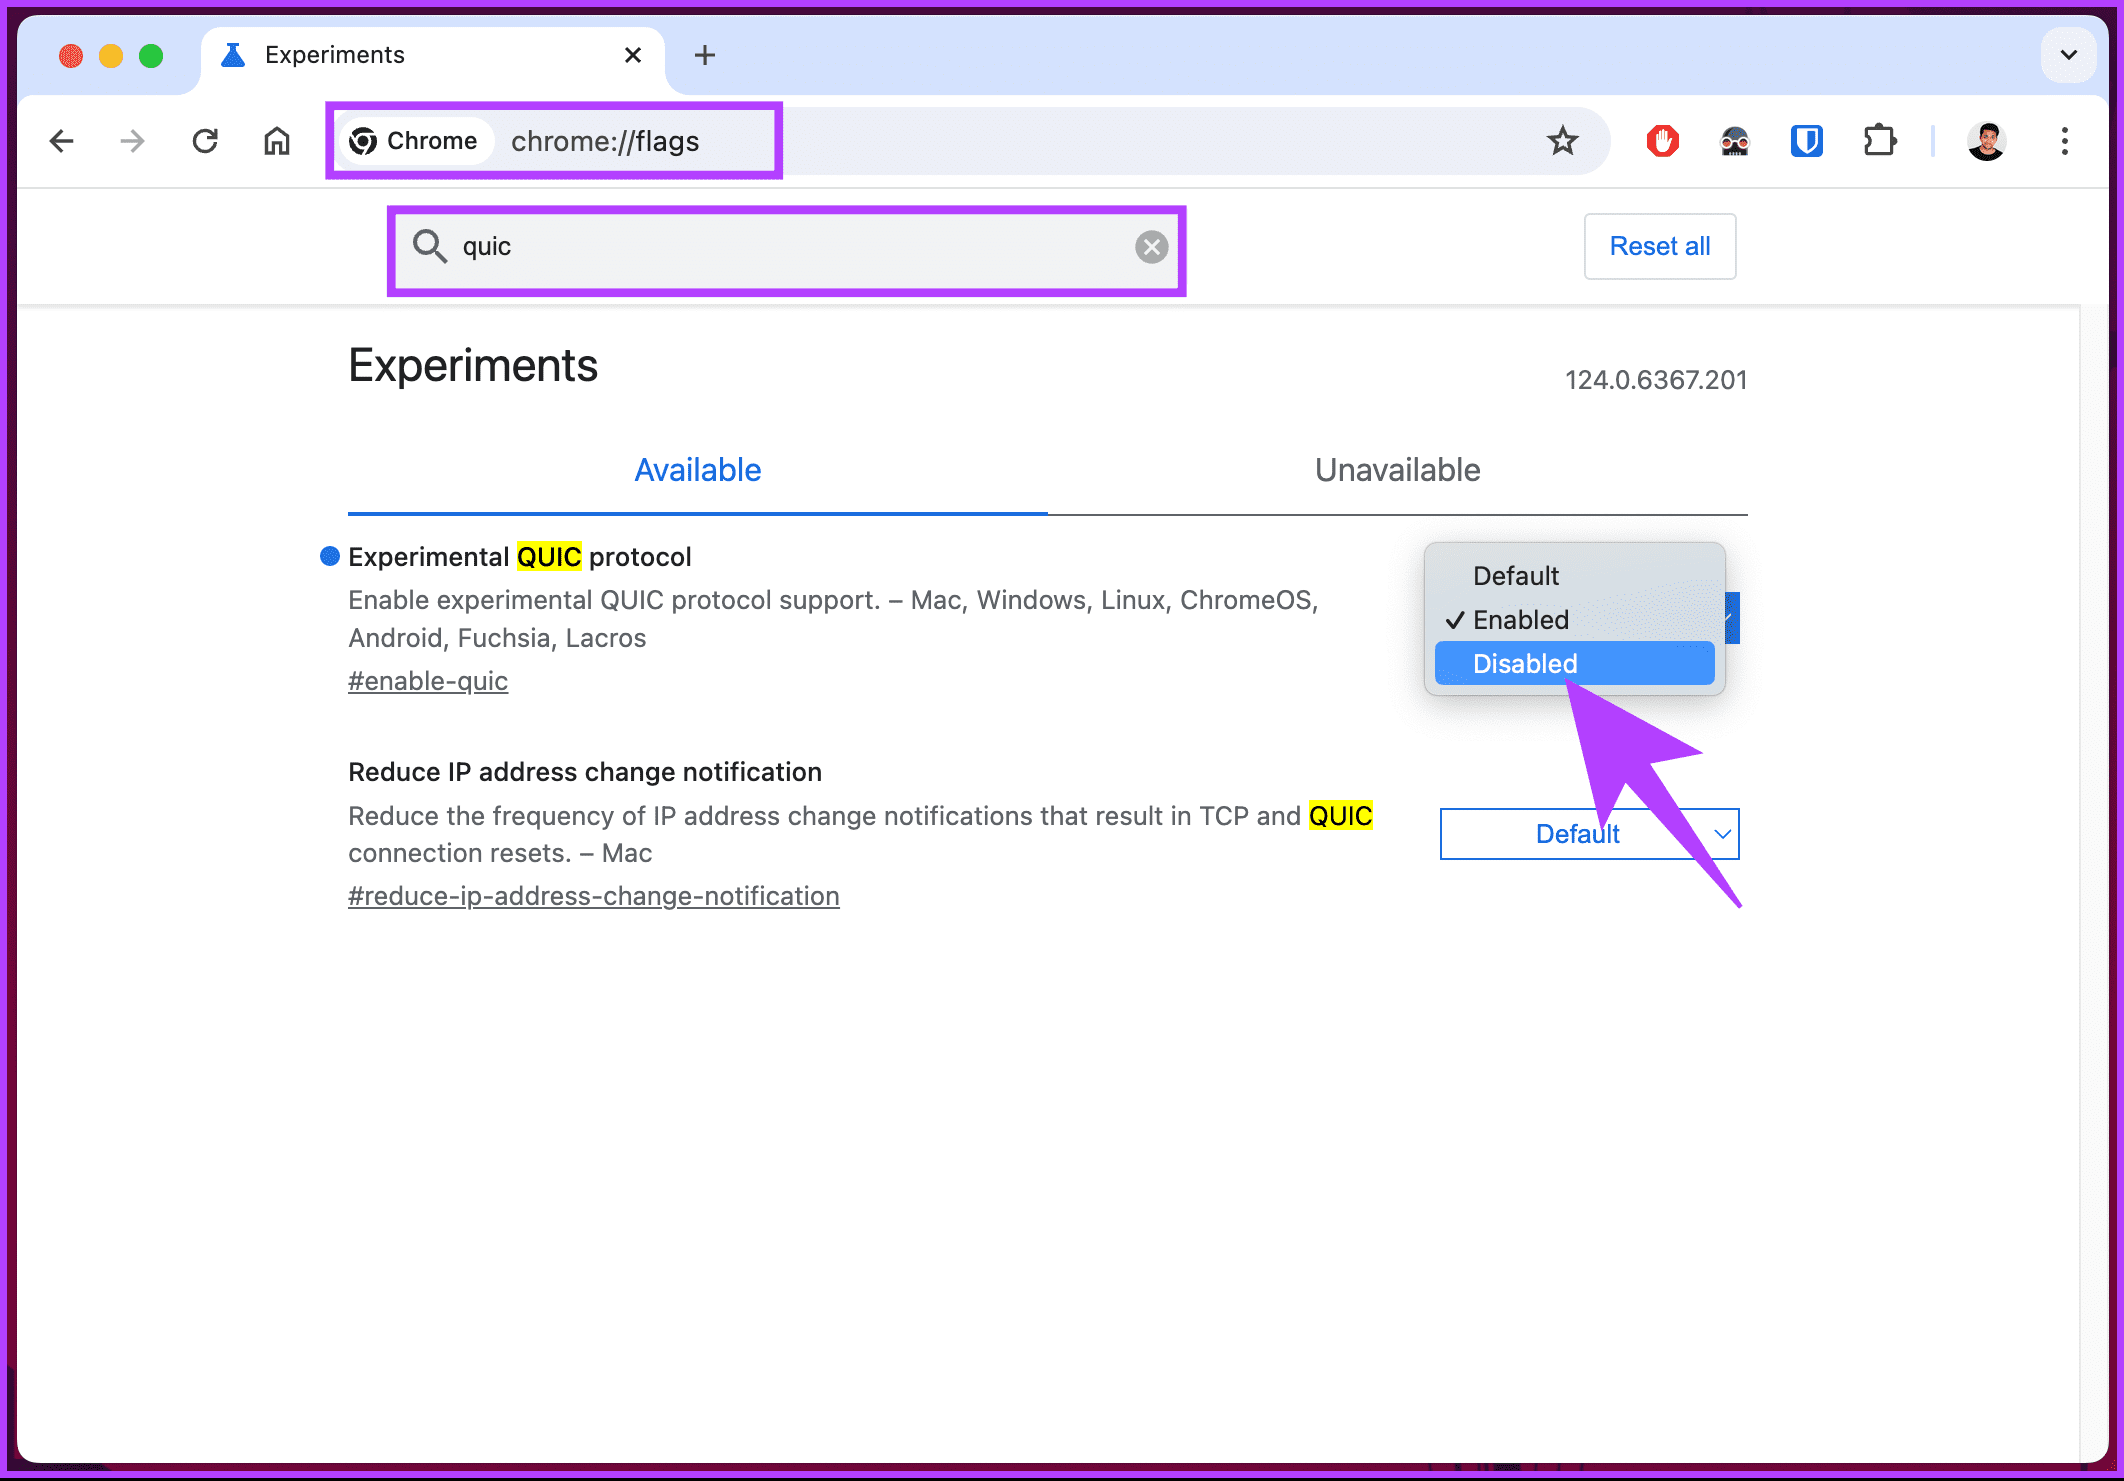
Once you’ve selected Disabled, relaunch Chrome for the changes to take effect. Click on the blue Relaunch button that appears at the bottom.
Also read: How to disable efficiency mode for Google Chrome on Windows 11
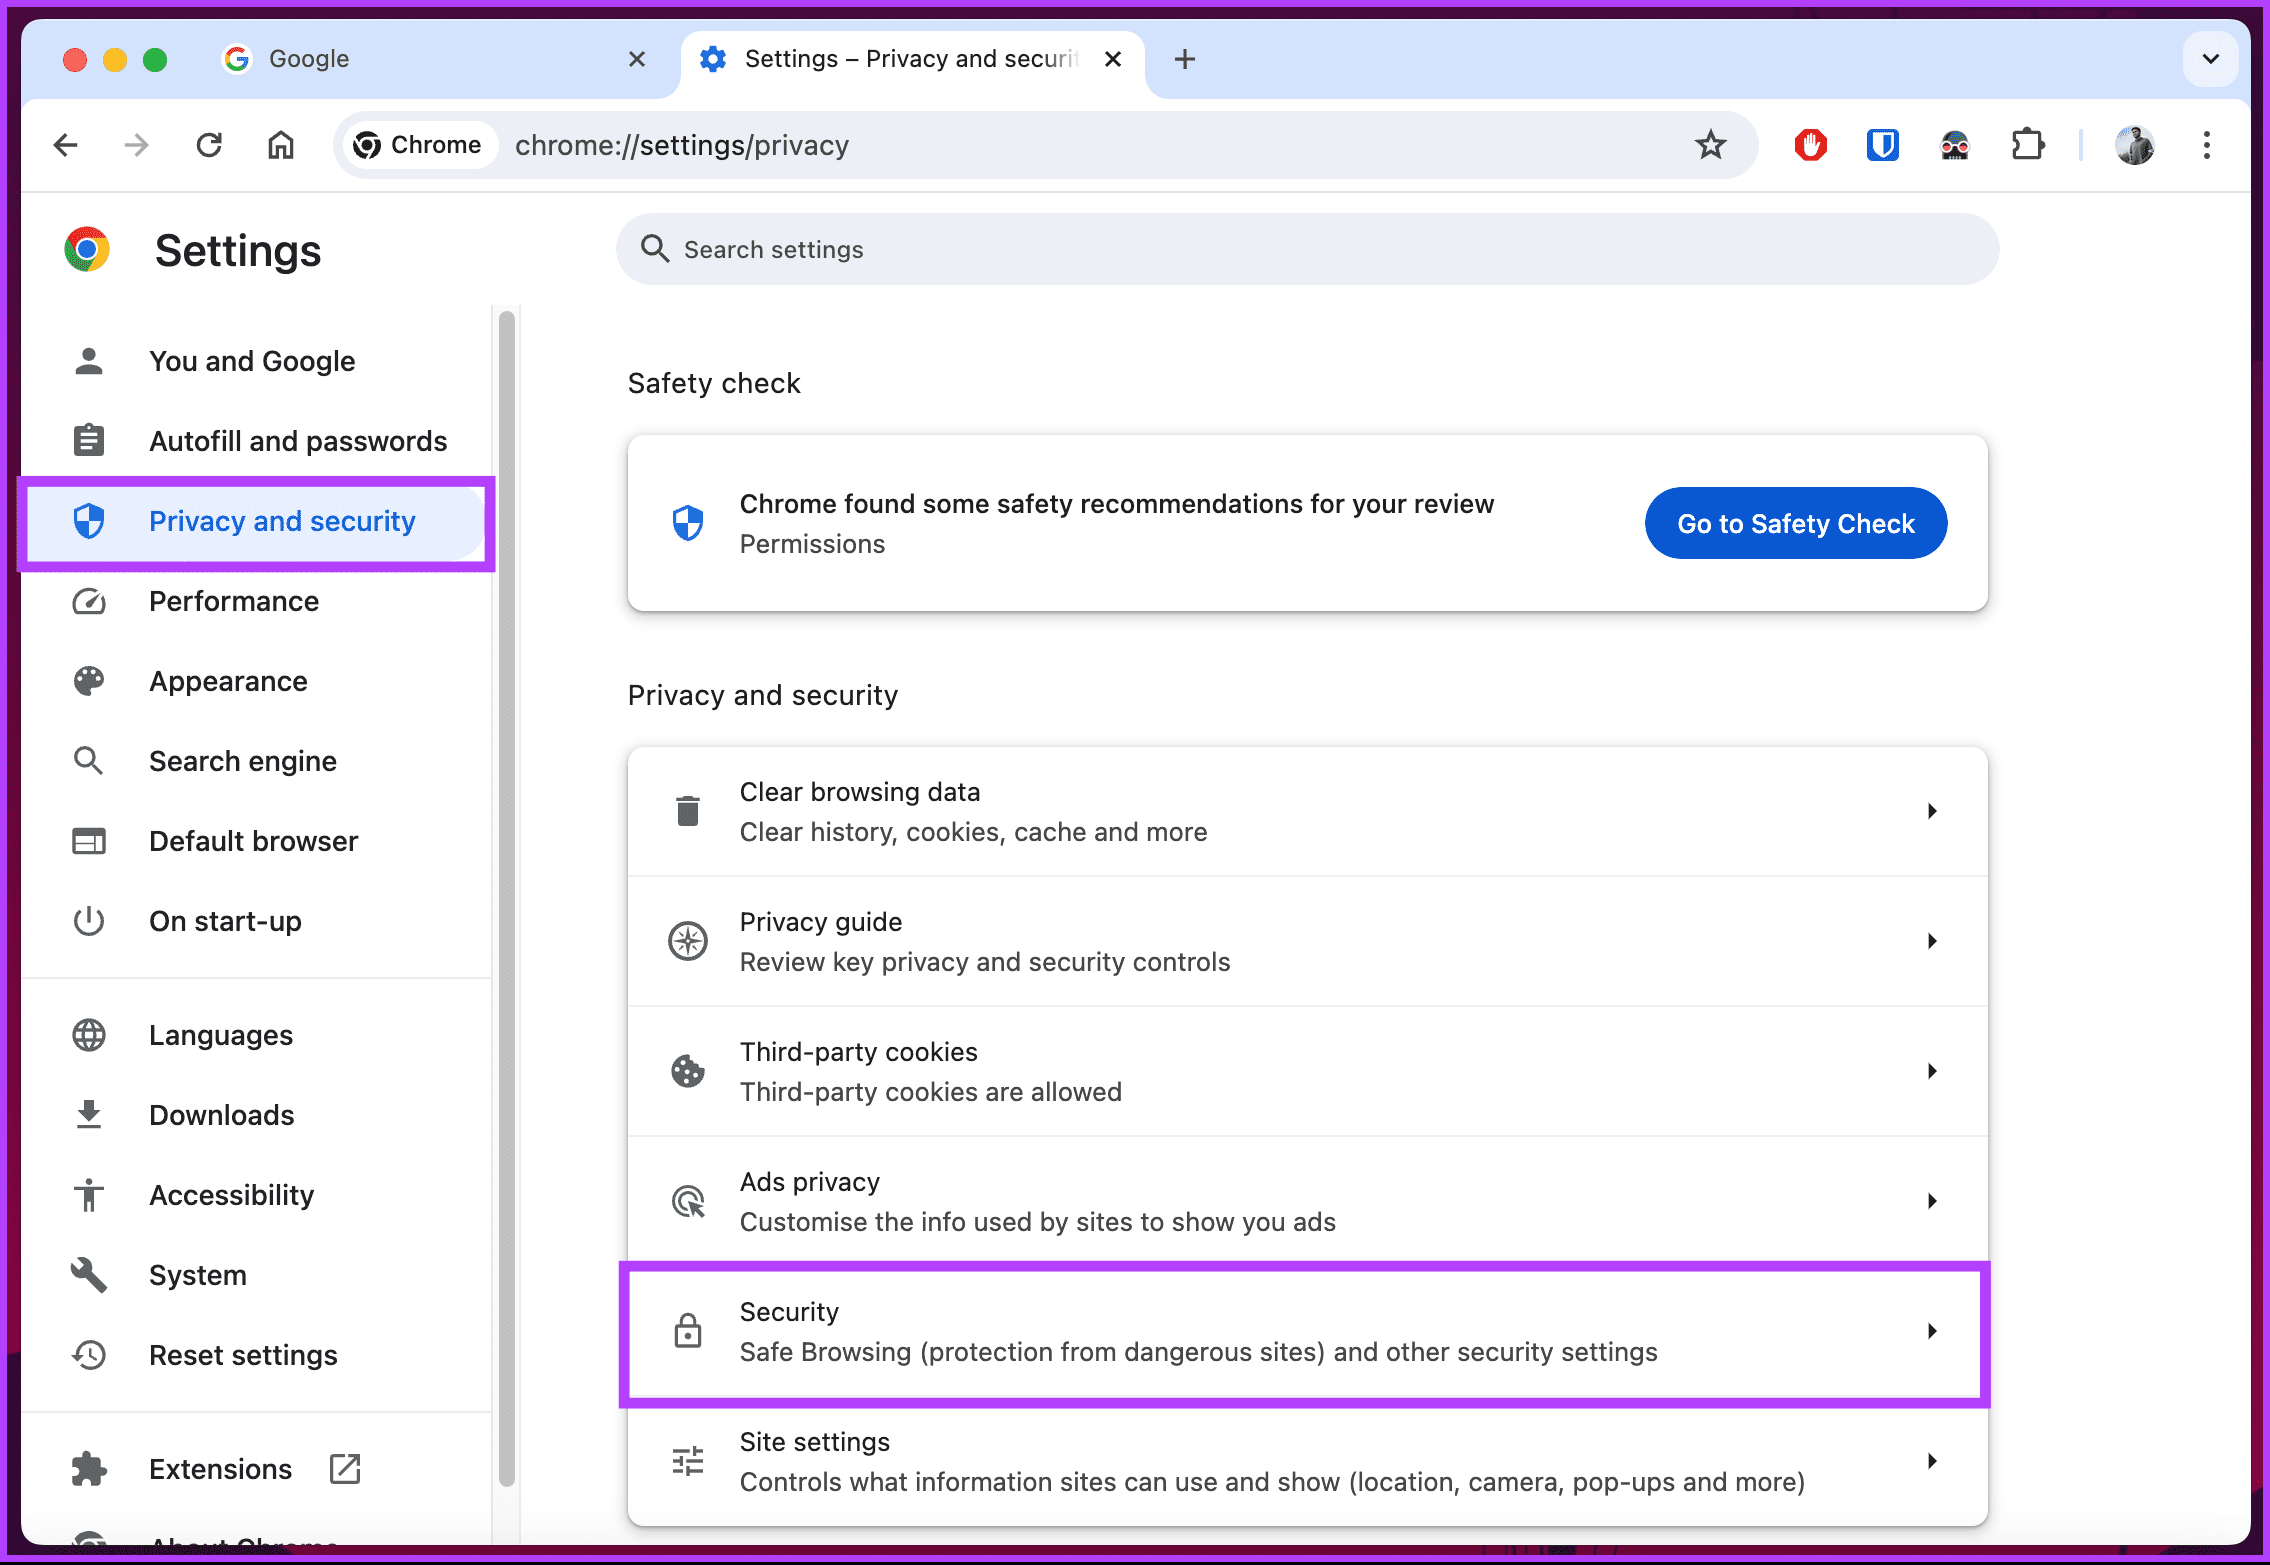
Fix 3: Switch to Cloudflare or Google DNS in Chrome
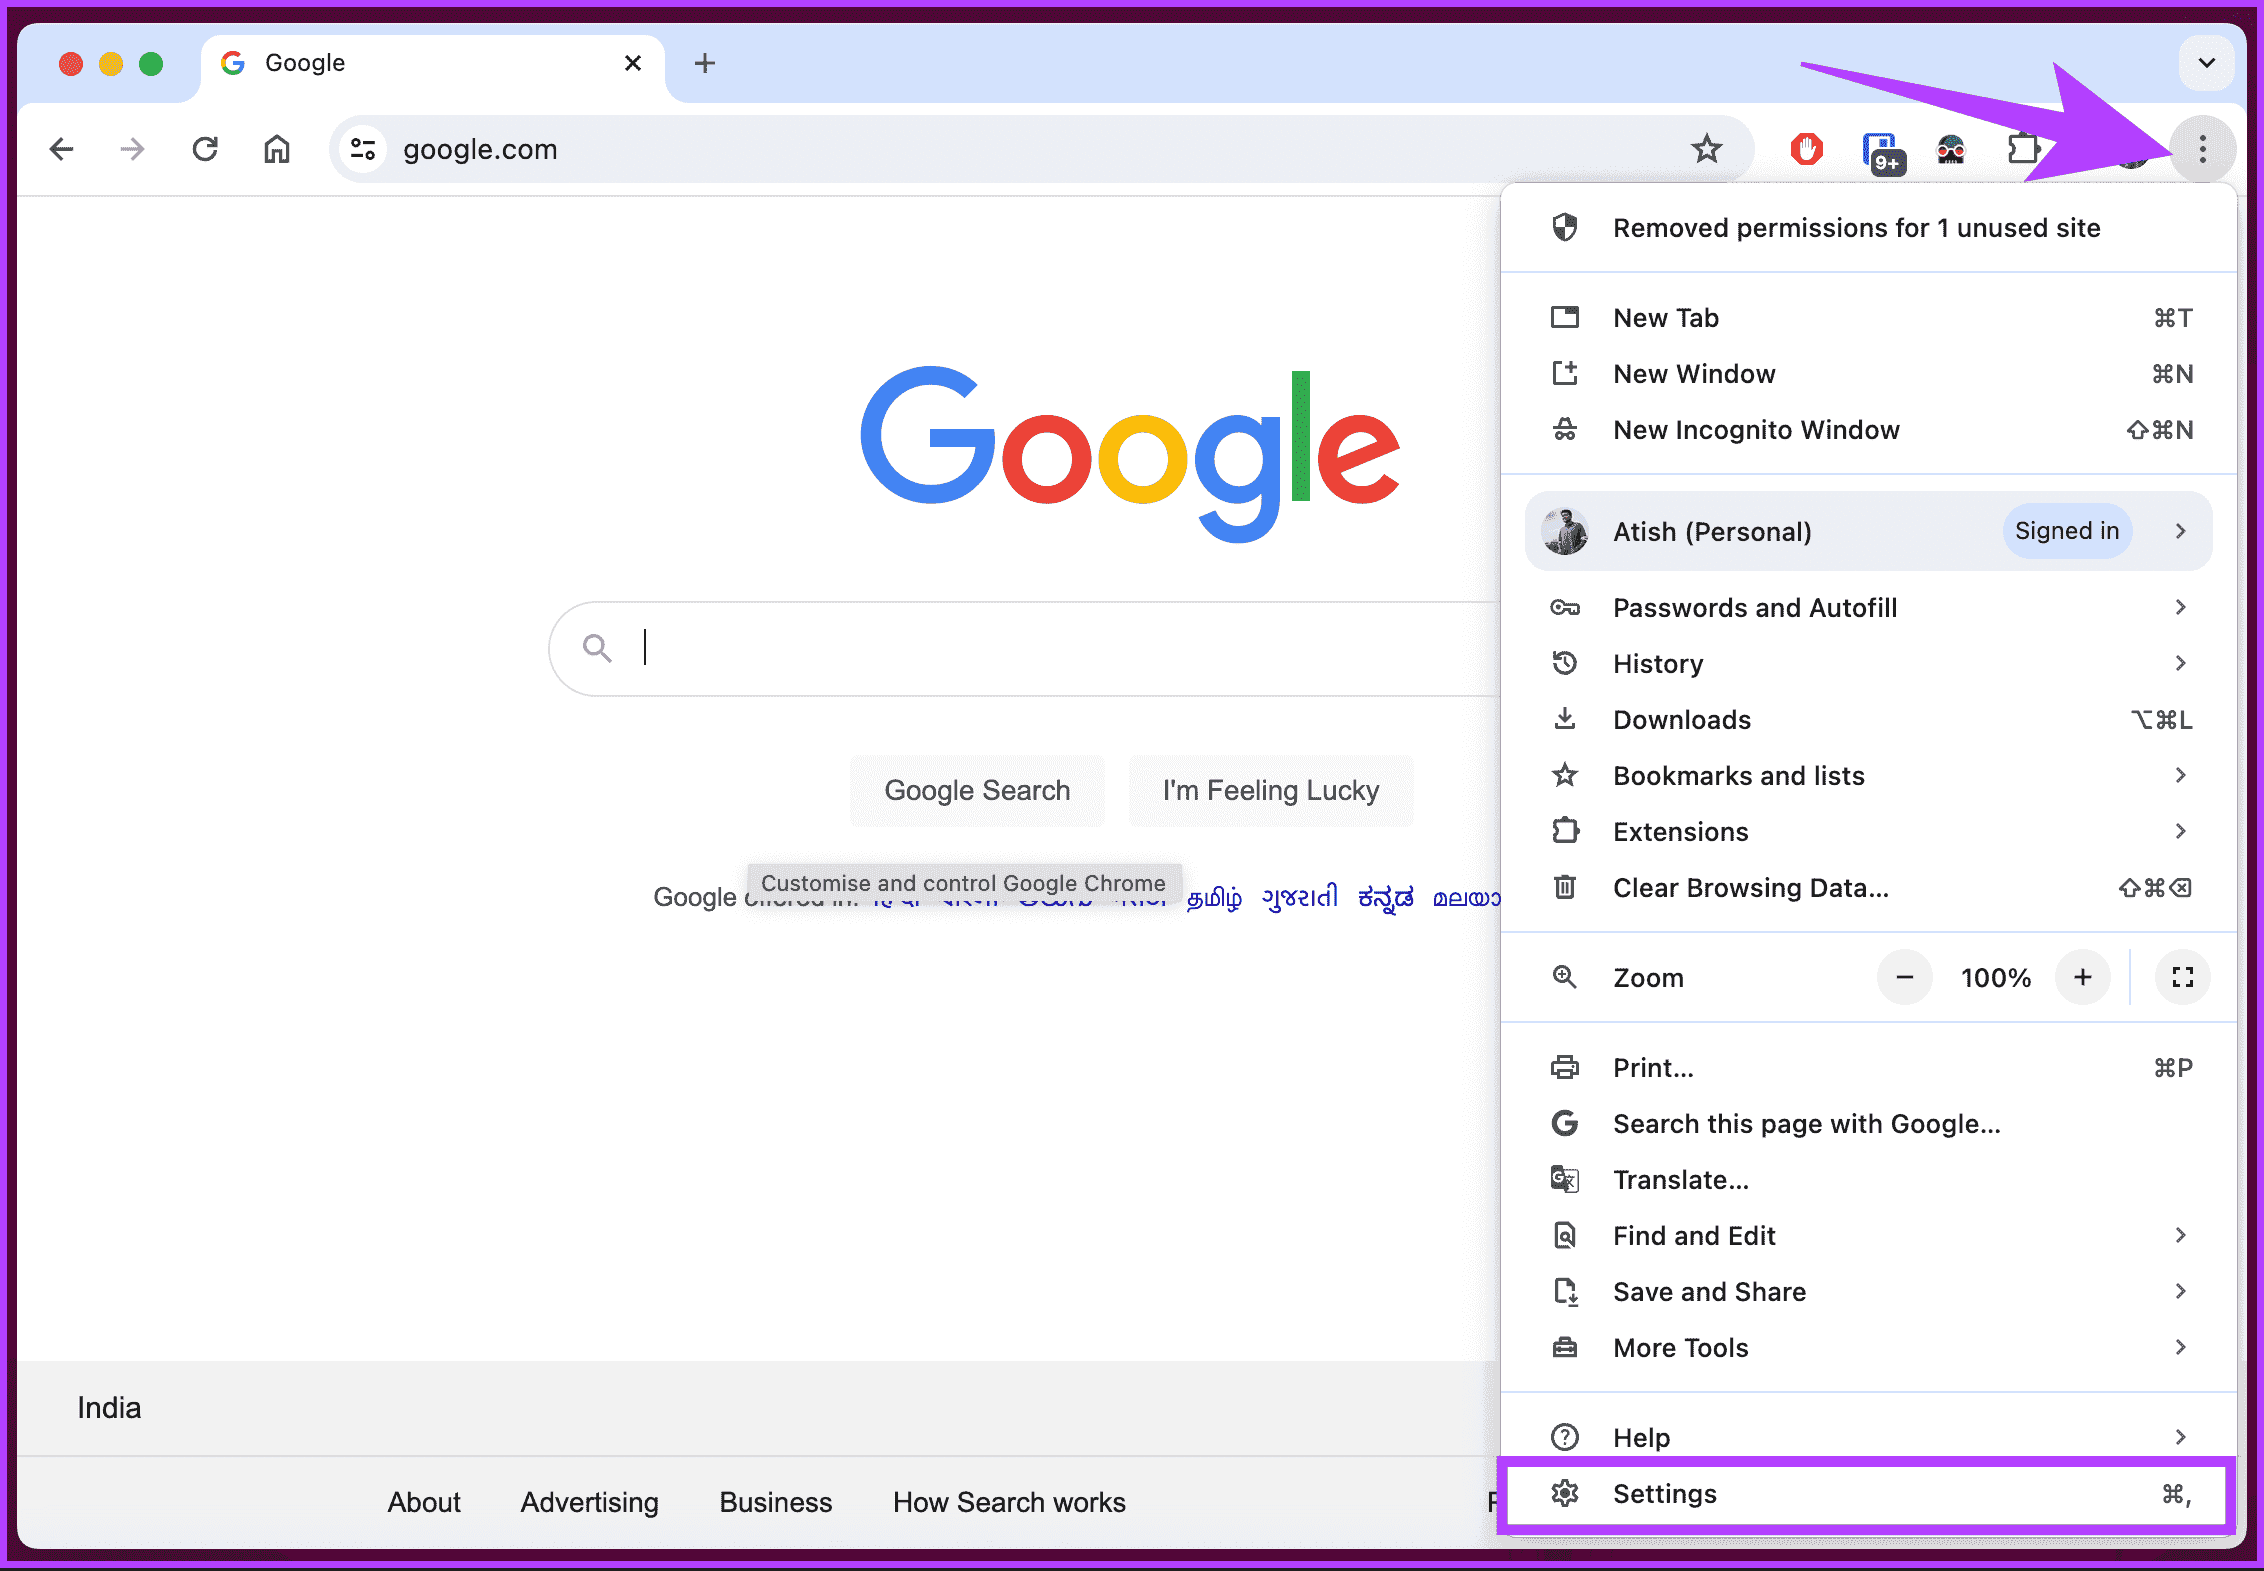
step 1: Launch the Chrome browser, click on the three vertical dot, and select Settings.
step 2: Within the Settings menu, scroll down and click on Privacy and security.
Step 3: Under Privacy and security, select Security.
Step 4: Under Advanced, next to SelectDNS provider, click on the chevron ( arrow ) icon and select Cloudflare (1.1.1.1).
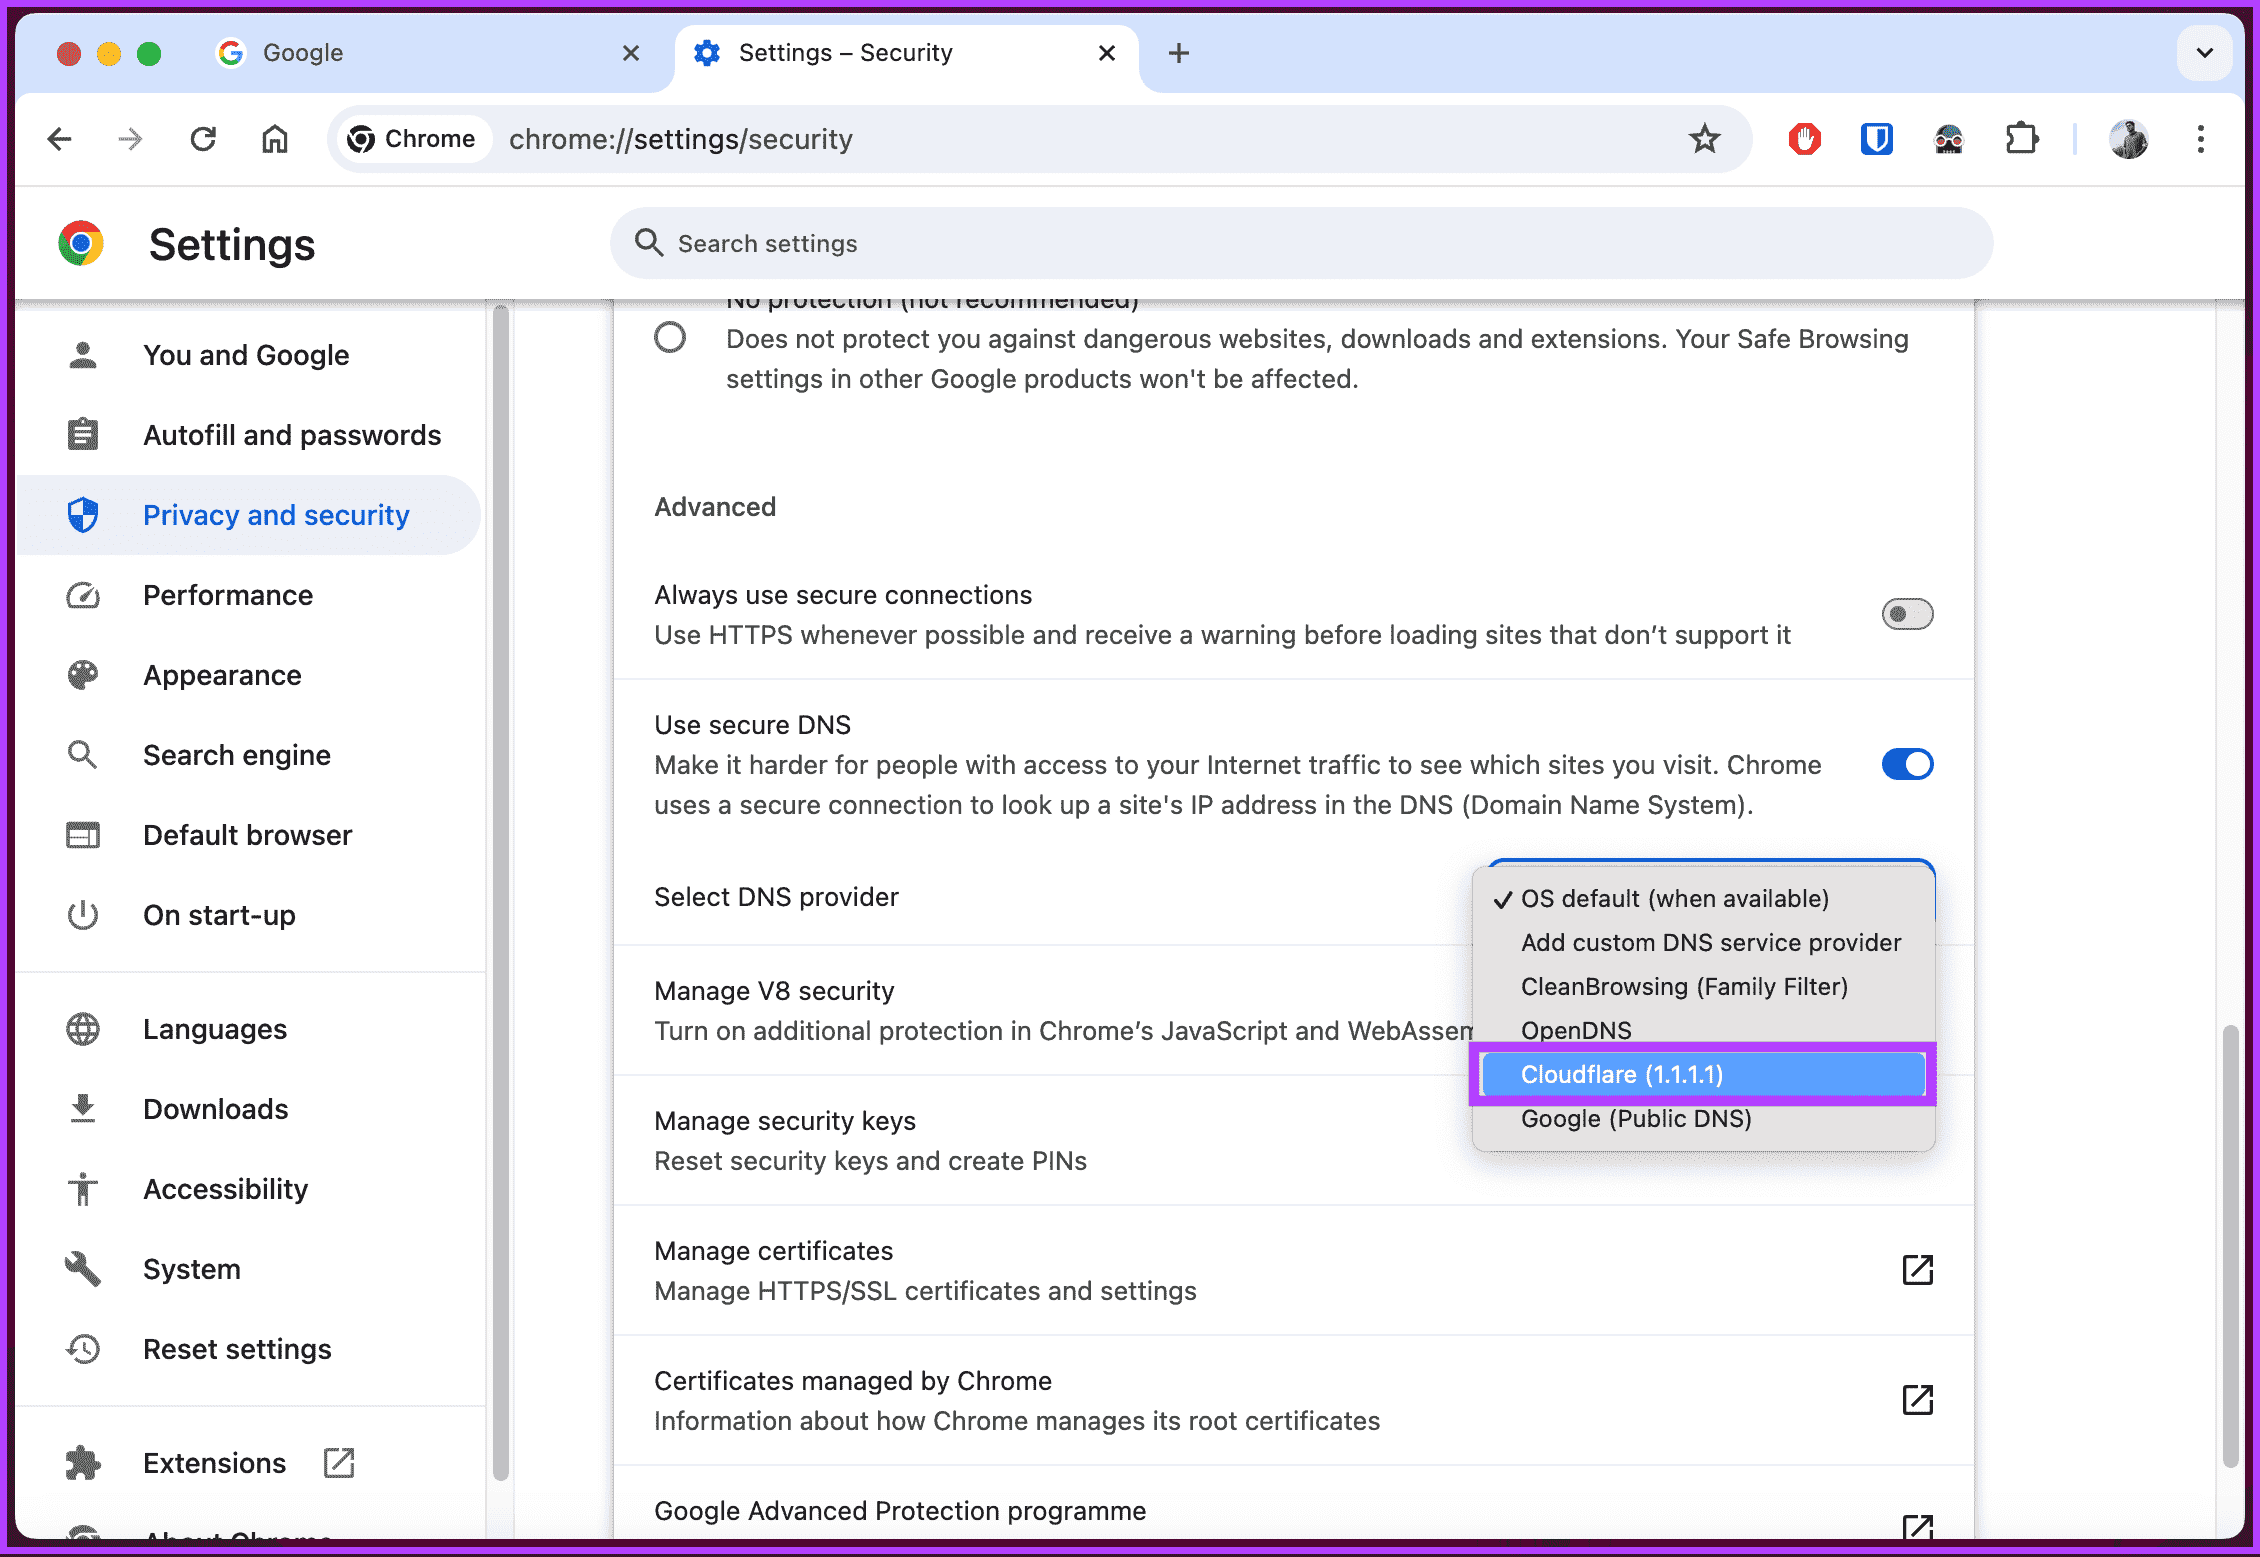
Once done, restart the Chrome browser. The issue should be resolved.
thank for your feedback !
© Copyright notes
The copyright of the article belongs to the author, please do not reprint without permission.
Related posts


No comments...