

Last updated:
This tutorial will show you how to set up ExpressVPN on Windows using the OpenVPN GUI (graphical user interface).
The OpenVPN GUI is a free graphical frontend for running the OpenVPN protocol on Windows XP, Windows Vista, Windows 7, Windows 8, and Windows 10.
Note : The following steps were tested on Windows 10 and are applicable to other versions of Windows.
Not all ExpressVPN locations may be available for manually configured connections. To use the full list of VPN locations, use the app setup.
Prefer app setup? See the instructions for app setup on Windows 10 and above.
Important: The OpenVPN manual configuration does not offer the same security and privacy benefits as the ExpressVPN app. If you are located in a country with a high level of internet censorship, you are recommended to use the ExpressVPN app for a more stable VPN connection.
1. Find your ExpressVPN account credentials
Go to the ExpressVPN setup page. If prompted, enter your ExpressVPN credentials and click Sign In.
Enter the verification code that is sent to your email.
On theright, with OpenVPN already selected for you, you will see your username, password, and a list of OpenVPN configuration files.
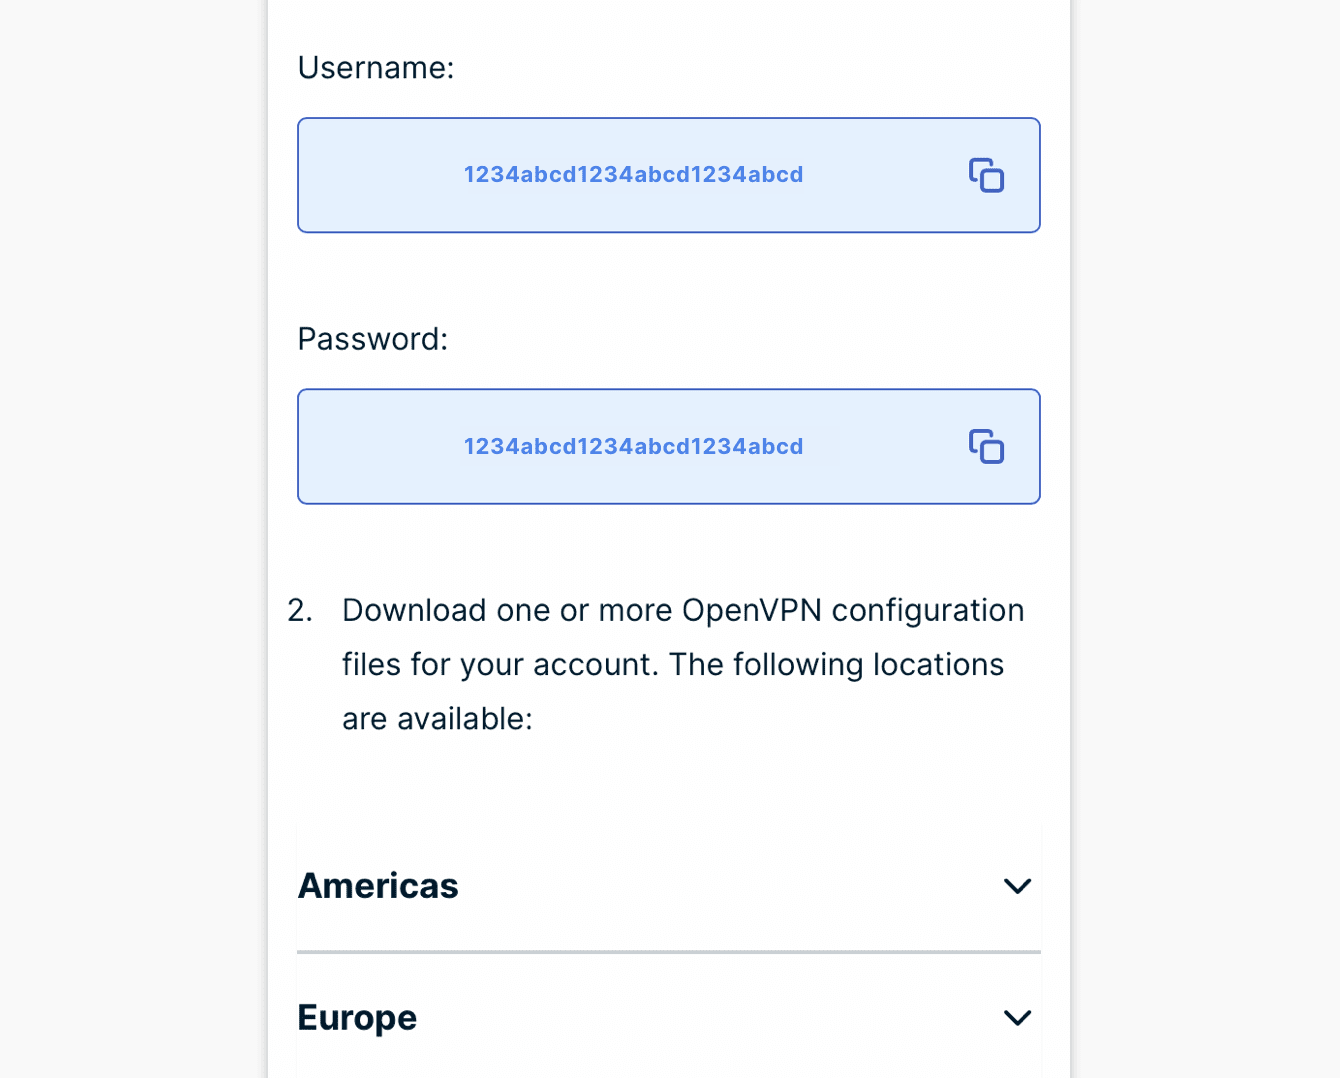
Click the location(s) you want in order to download the .ovpn file(s).
Keep this browser window open. You will need this information for the setup later.
Need help ? Contact ExpressVPN Support Team immediate assistance .
Back to top
2. Download and install the OpenVPN GUI
Download the OpenVPN GUI appropriate to your Windows operating system.
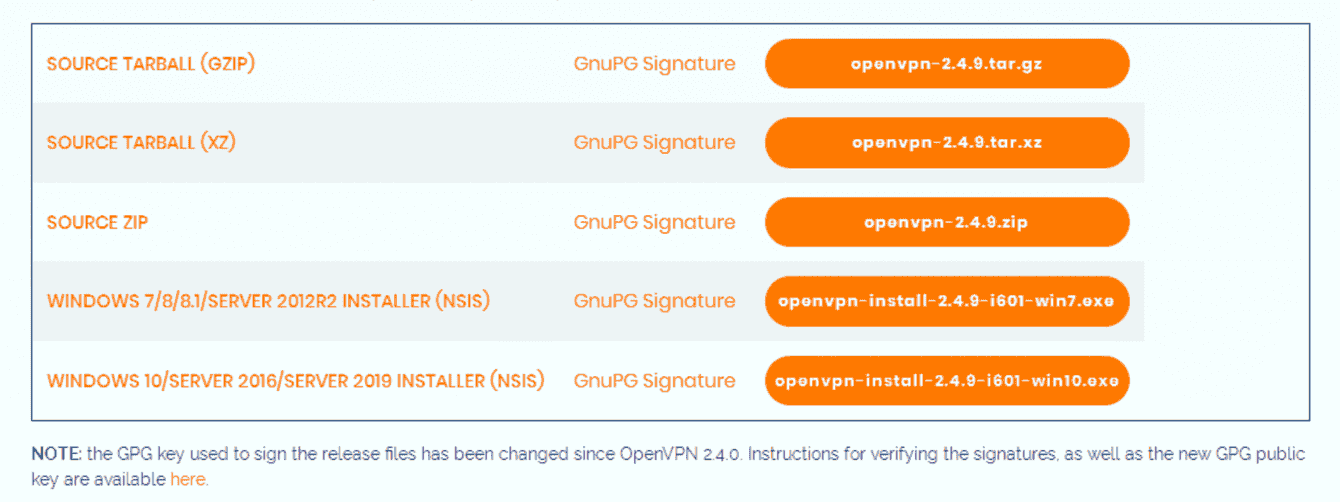
Note : Windows XP , download OpenVPN 2.3.18 .

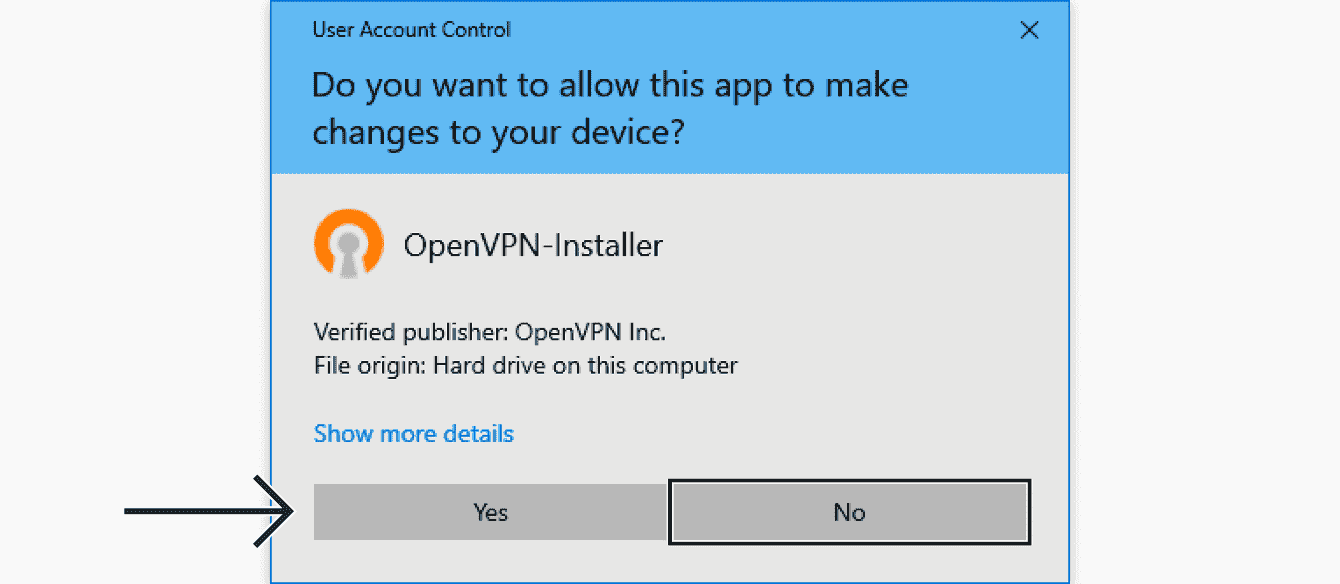
Open the OpenVPN GUI installer .exe file.
prompted allow OpenVPN installer changes device , clickYes.
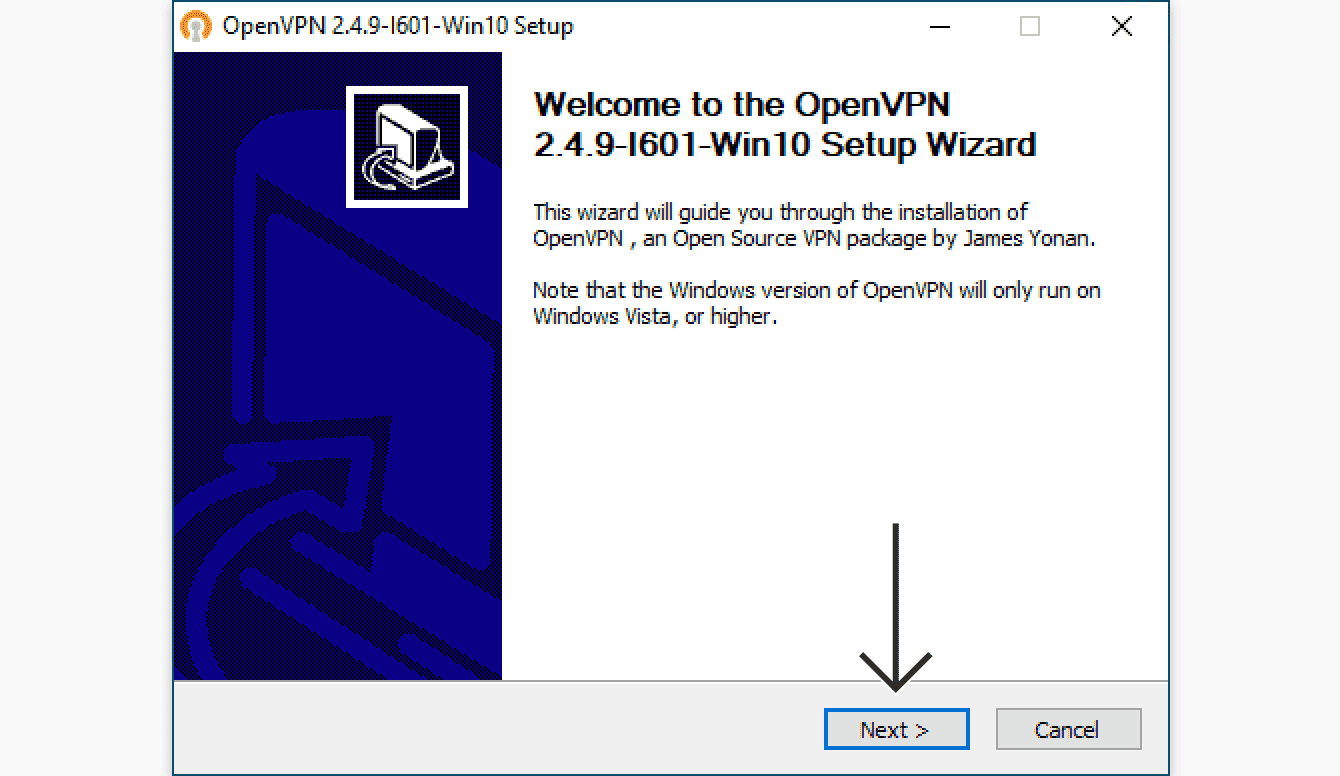
Click Next to start the installation.
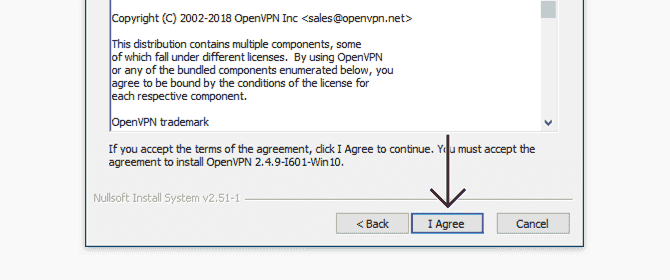
Read the License Agreement, clickI Agree.
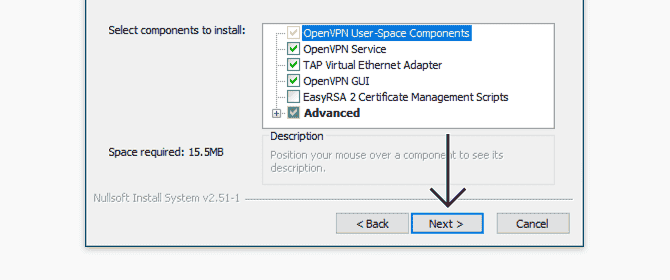
On theChoose Components screen, click Next.
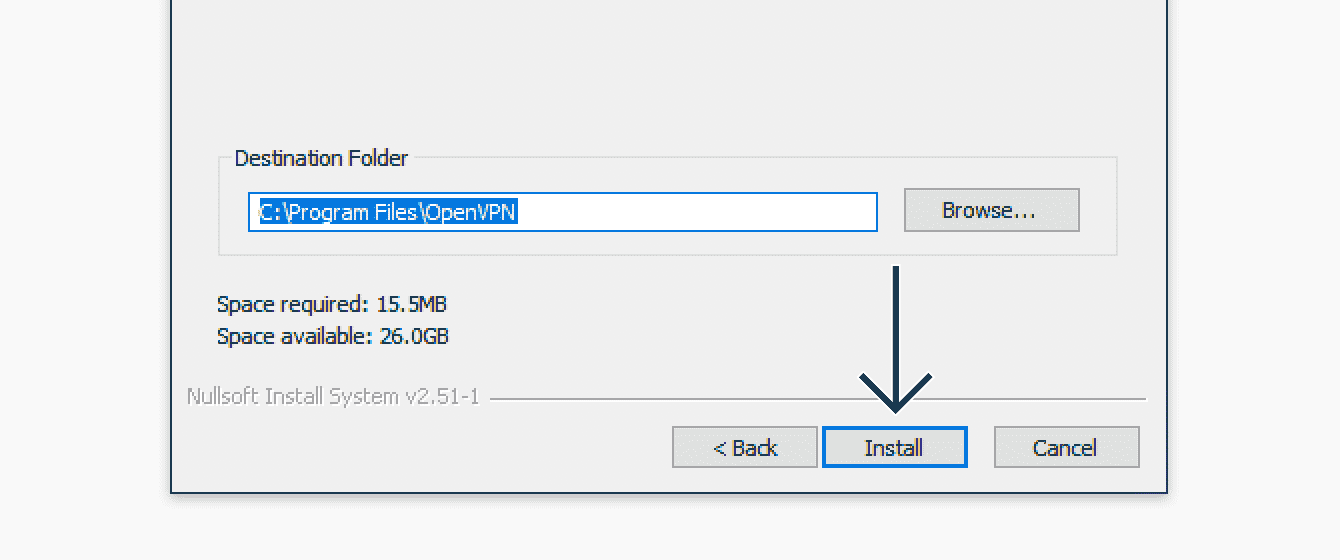
On theChoose Install Location screen, click Install.
When the installation is complete, click Next.
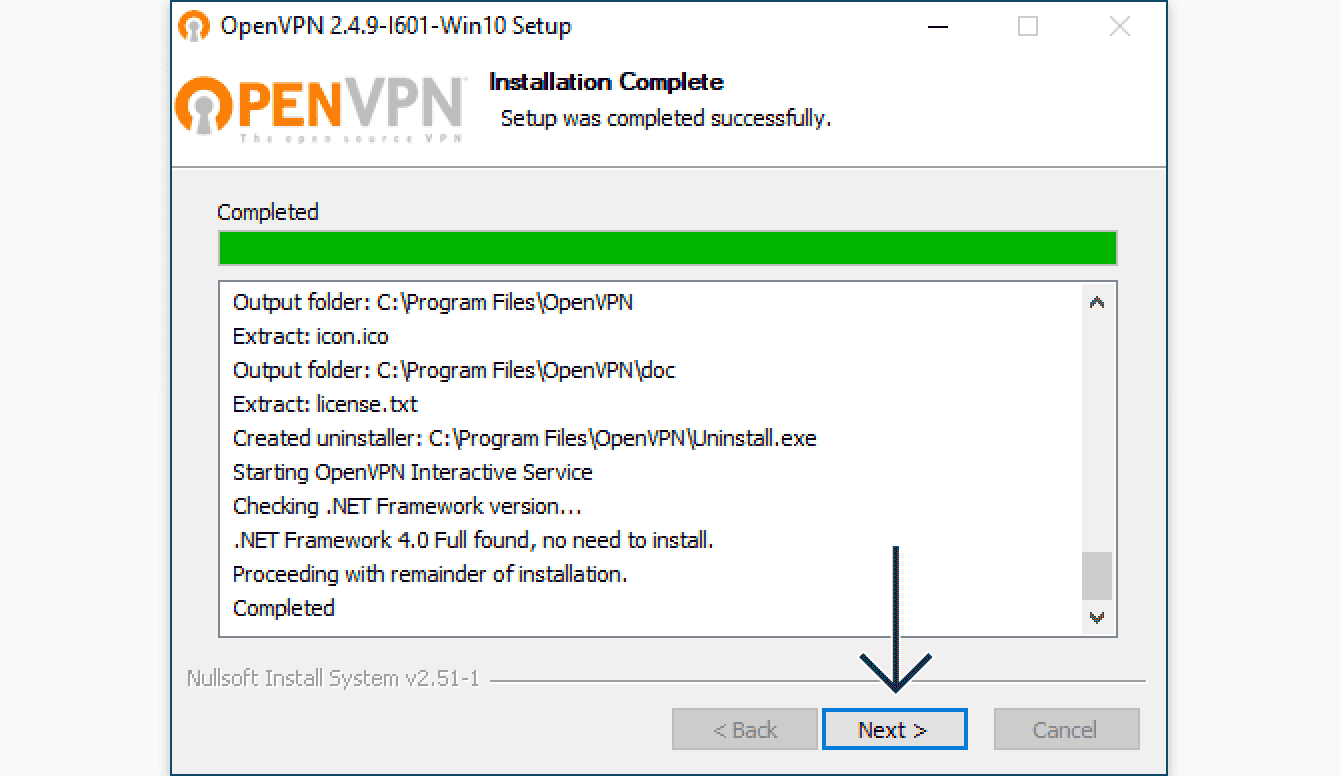
After OpenVPN has been installed on your computer, uncheck the box for Show Readme, clickFinish.

Need help ? Contact ExpressVPN Support Team immediate assistance .
Back to top
3 . Set OpenVPN GUI
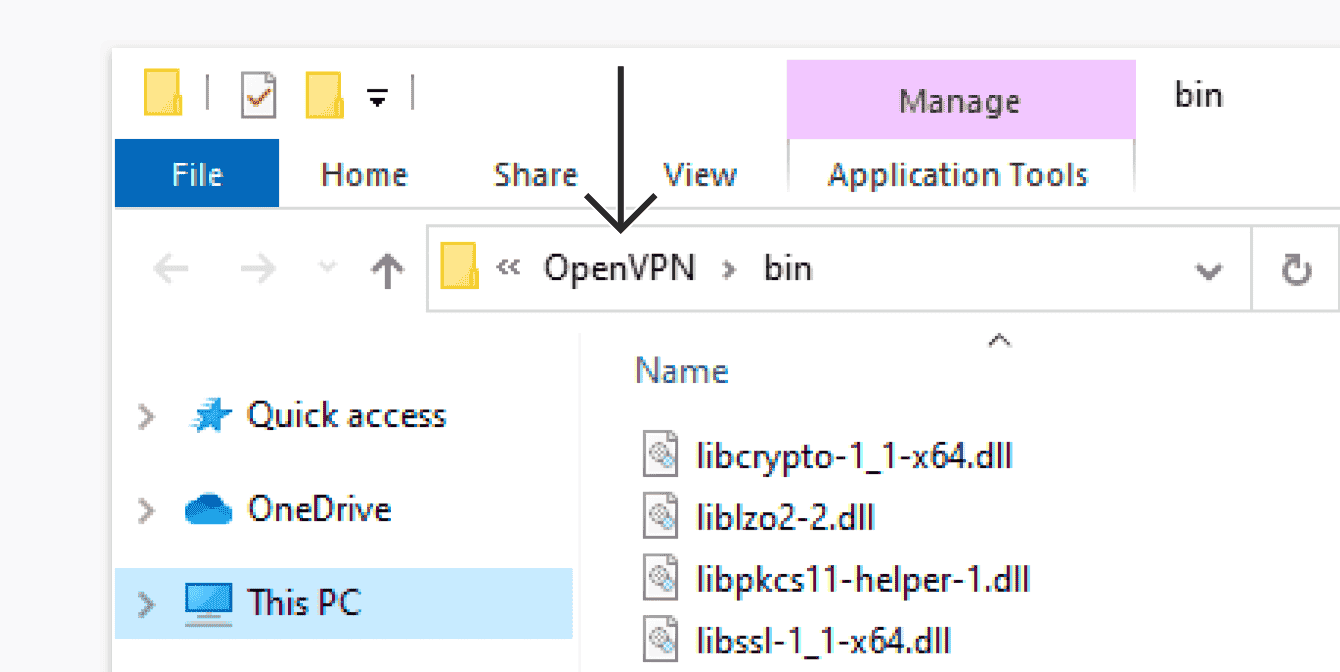
On your desktop, right-click the OpenVPN GUI shortcut, clickOpen file location.

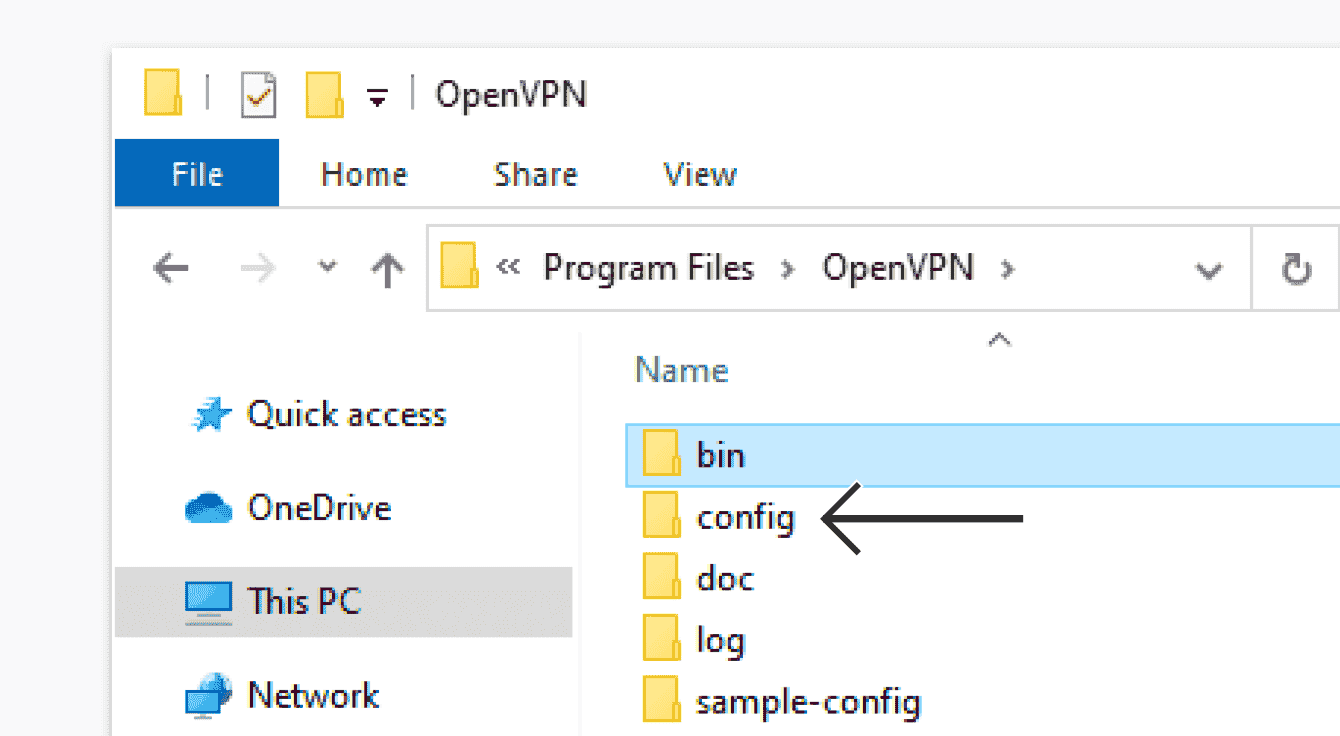
In the navigation bar, click OpenVPN to go up one directory.
Double – clickconfig folder.
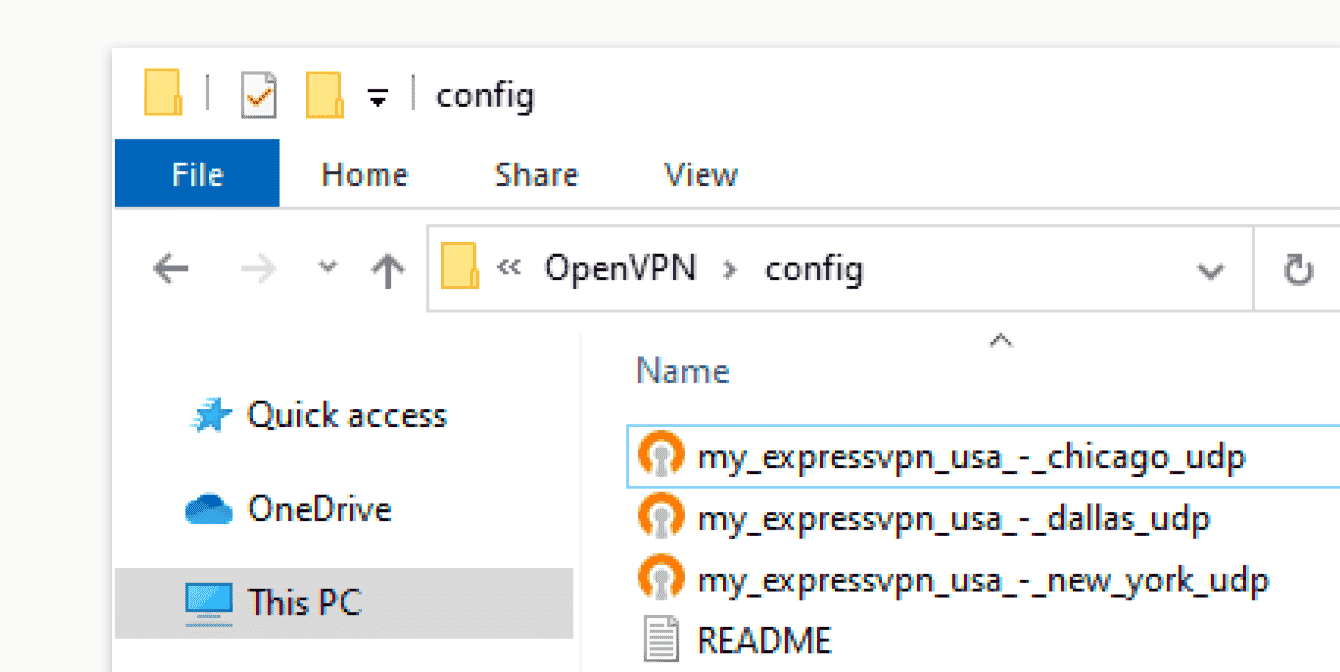
Move the OpenVPN configuration files you obtained earlier into the config folder.
When asked to provide administrator permission, click Continue. 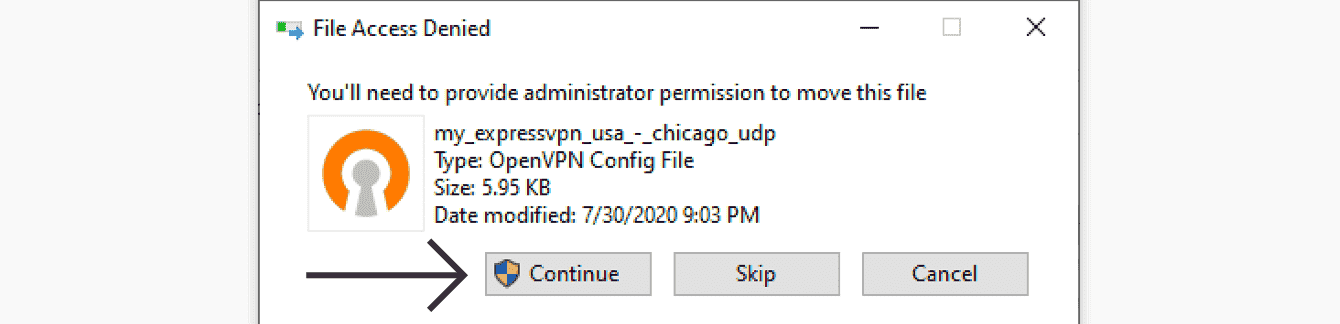
Need help ? Contact ExpressVPN Support Team immediate assistance .
Back to top
4. Set up DNS leak protection
prevent online activities exposed , you is edit edit configuration files prevent DNS leaks .
In the config folder, double-click the OpenVPN configuration file. It will open in a notepad or text editor.
Do not modify the existing text. Scroll to the bottom, add a new row, and paste the following:
block - outside - dns
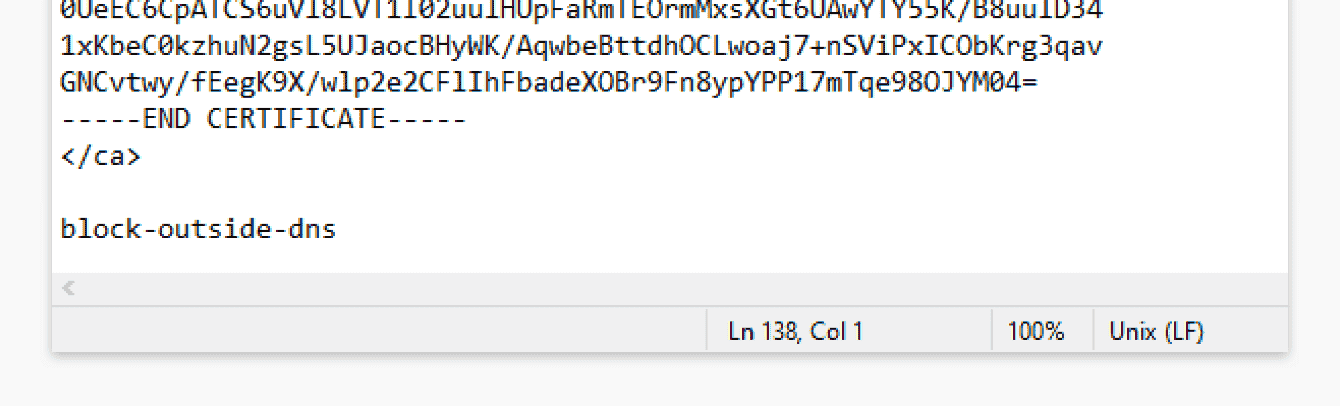
Save the file, then close the text editor.
Need help ? Contact ExpressVPN Support Team immediate assistance .
Back to top
5. Connect to a VPN server location
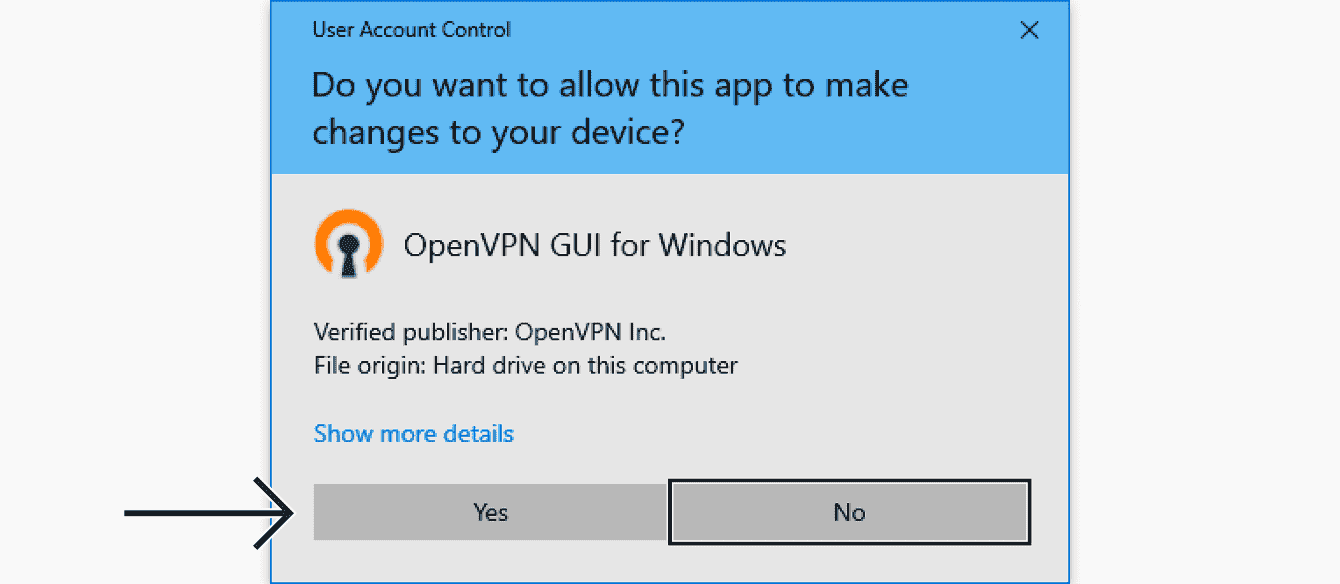
Right-click the OpenVPN GUI shortcut on your desktop, then select Run as administrator.

When prompted to allow OpenVPN to make changes to your device, click Yes.
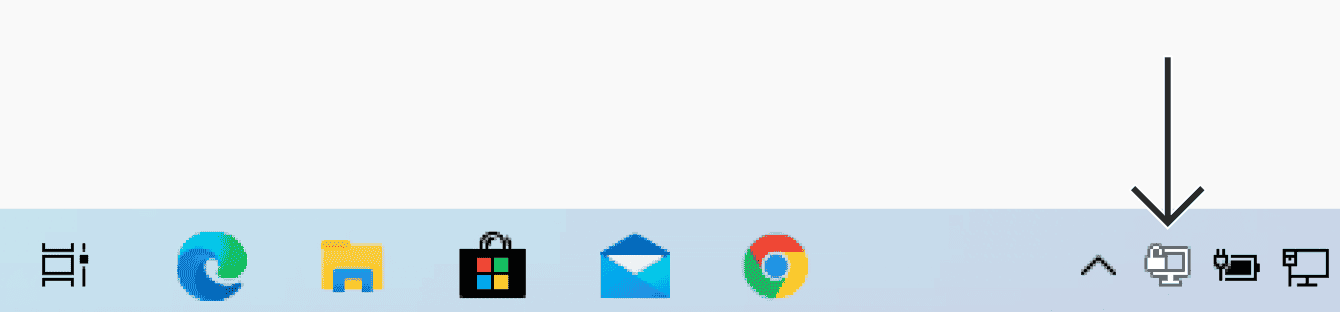
The OpenVPN GUI is now added to your system tray as an icon.
Click , drag OpenVPN GUI icon system tray easier access .
Right-click the OpenVPN GUI icon. You will see a list of all the VPN server locations you previously added. Hover over your preferred VPN server location, clickConnect.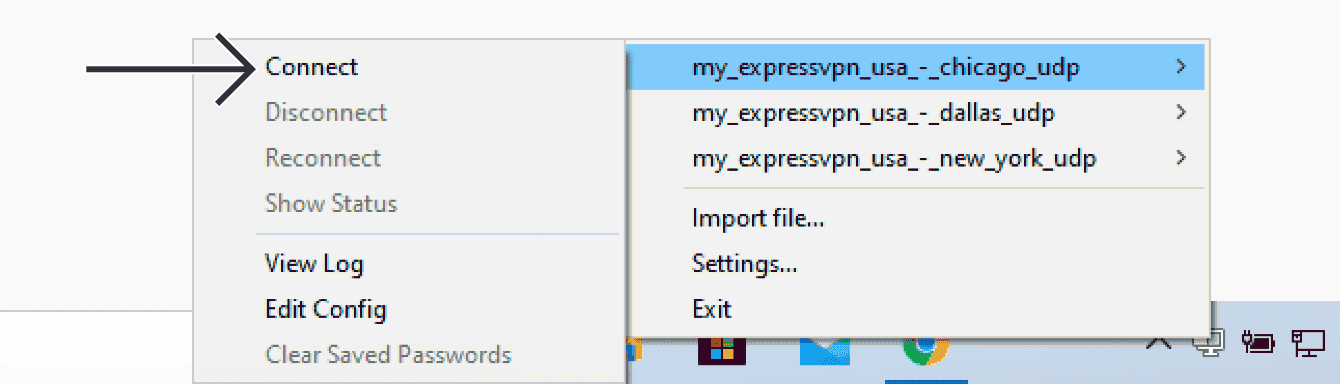
Enter the ExpressVPN OpenVPN username and password you found earlier, clickOK.

When you are connected to ExpressVPN successfully, you will see a successful connection message.

connect different VPN server location , disconnect current connection connecting server location .
Need help ? Contact ExpressVPN Support Team immediate assistance .
Back to top
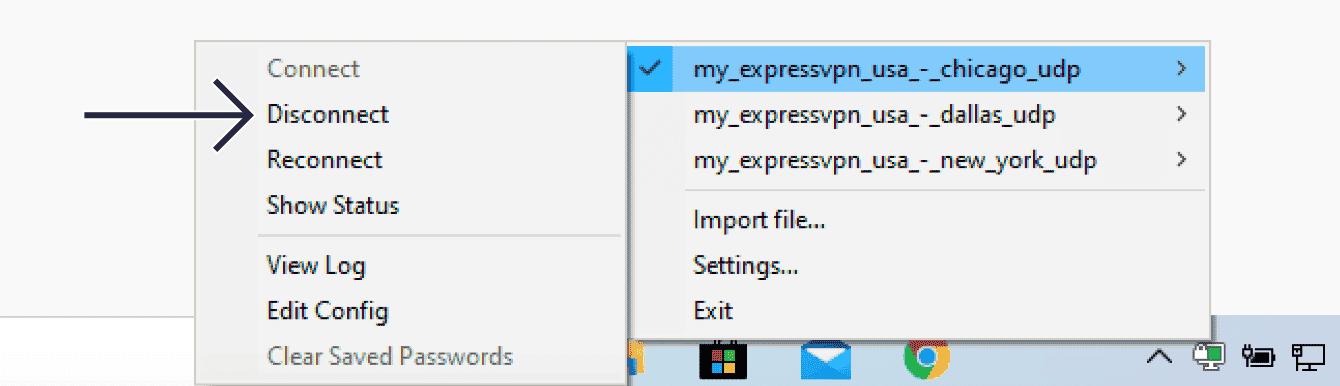
Disconnect VPN server
To disconnect from a VPN server location, right-click the OpenVPN GUI icon in the system tray, hover over your current VPN server location, clickDisconnect.
Need help ? Contact ExpressVPN Support Team immediate assistance .
Back to top
article is Was helpful ?
We’re sorry to hear that. Let us know how we can improve.
© Copyright notes
The copyright of the article belongs to the author, please do not reprint without permission.
Related posts


No comments...