

- Set Accept DNS Configuration to Strict you is planning planning use NordVPN home network devices Exclusive if you will use it on specific devices. We recommend setting it to Strict.
- In the Custom Configuration field is enter , enter text :
remote-cert-tls server
remote-random
nobind
tun-mtu 1500
tun – mtu – extra 32
mssfix 1450
persist – key
persist-tun
ping-timer-rem
reneg-sec 0#log /tmp/vpn.log
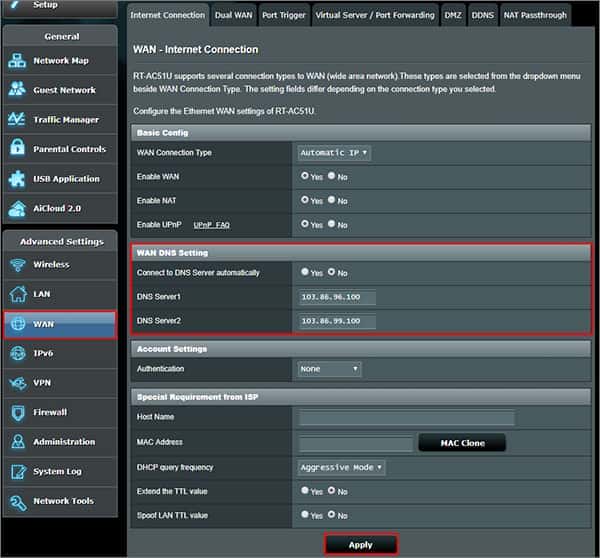
- Now you need to configure NordVPN’s DNS settings. In the left sidebar, click WAN. In the Connect to DNS Server automatically field is select , select No and fill in NordVPN’s DNS servers as follows:
103.86.96.100
103.86.99.100
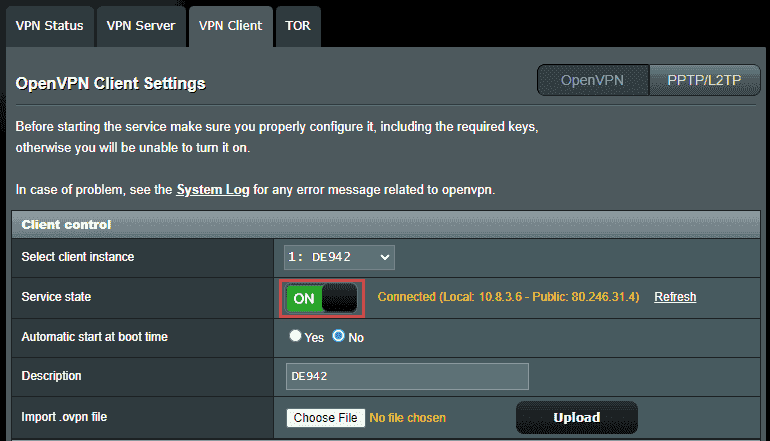
- Click Apply at the bottom of the page and wait a few seconds for the changes to apply. If you can see the green ON button, congratulations – you are now connected! You can verify this by going back to the VPN Status tab or by checking your IP address on our website (you will find your connection status, along with your IP address and ISP, at the top of the page).
Optional Kill Switch setup (for advanced users):
set Kill Switch feature AsusWRT Merlin firmware :
- Go to VPN > OpenVPN Client.
- Under Advanced Settings, select Redirect Internet Traffic: Policy Rules
- A new option will appear, Block routed clients if tunnel goes down. Enable it.
- Under Rules for routing client traffic through the tunnel, add network :
Description: devices
Source IP: 192.168.1.0/24 (if you have a different network or subnet mask, change accordingly)
Destination IP: leave blank
Iface : VP
If you’re wondering what other opportunities their are for using NordVPN with a router, here are some more compatible routers.
© Copyright notes
The copyright of the article belongs to the author, please do not reprint without permission.
Related posts


No comments...